Tuesday, February 7, 2012

Started setting the
Started setting the "cherry" 6x24 porcelain plank tile on the Greater Northdale/Tampa, Florida project.

Monday, February 6, 2012

Tampa, FL (damp slab) vapor reduction membrane installation: Laticrete 312 Latapoxy
Started the carpet rip up & tile foyer removal on the Greater Northdale/Tampa FL porcelain plank tile project.

Saturday, February 4, 2012

To DIY Tile or Not to DIY Tile - http://ping.fm/x72L5

End of Blogs on Blogger

Since we have been making all of our tile related Blog posts on ceramictec.com there will not be anymore blog posts here on Blogger.

We had stopped doing blogs here well over a year ago to drive web traffic directly to our Tampa Florida Tile Contractors website.

We will now link Blogger to our update platform and post daily work progress updates & will utilized Blogger like Twitter & Facebook.

please visit our blog: http://ceramictec.com/blog


Thank You,
Ceramictec

Wednesday, August 11, 2010

Making a Carrara Marble Soap & Niche Shelf

To see the original blog go to our website:
Making a Carrara Marble Soap & Niche Shelf

Recently here in Florida I have been asked to build more niche’s in showers these days then ever before. Not only is a niche a good way to get a little extra room in the shower it also adds a little bit of style to your newly tiled shower. A niche will give you some extra room to place your shampoo bottles, razor or other things you use often in a nice little pocket set into your tiled shower wall. This will stop all that stuff from being cluttered on your shower floor or window ledge.

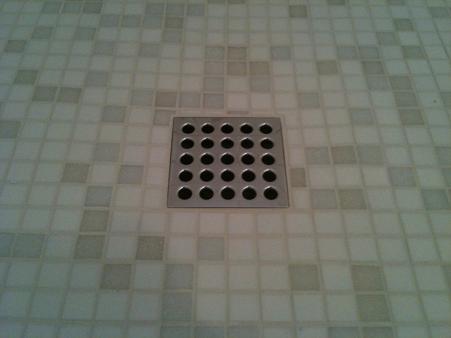
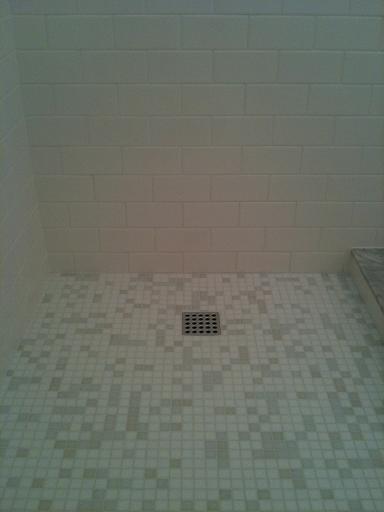
The pictures below are from a recent Custom tiled shower I did in St. Petersburg, Florida. The homeowners selected a 3×6 American Olean subway tile on the shower walls, 1×1 Glass tile in a mixture of white, gray and light gray on the shower floor (glass tile is Hakatai TA810 M China Blend) and 16×16 white Carrara marble on the main bathroom floor. The shower was waterproofed with Laticrete Hydro Barrier liquid waterproofing and a chrome Ebbe drain was also used. The homeowners had asked me to build a niche on the shower wall opposite of the shower head.

They wanted the niche to be set in the 3×6 subway tile, while it is a nice look at told them that it would be a little plain with the white tile and the bullnose tile. I suggested using the same 1×1 glass tile on the back of the niche and also making a couple shelves out of the Carrara marble we were using, and also to make a couple corner soap shelves and place them on each corner of the shower walls. This would add some of the glass tile and marble tile being used on the shower floor & main floor and bring it into the shower walls.

They liked my idea’s and gave me the approval to go ahead with the installation. These were additional adds to the original price but they understood this would class up a plain white shower and be worth the small amount it would cost to do. They also knew they would like the shower better in the long run and add style to it.

After I laid out the shower to achieve full tile in the corners and ends of wall, I laid out where the niche would go. I made the niche fall on the horizontal grout joints so it would fit nicely and look good visually. I also laid out where the corner marble shelves would go prior to cutting, fabricating and polishing them. below I will explain the process of how I made the shelves.

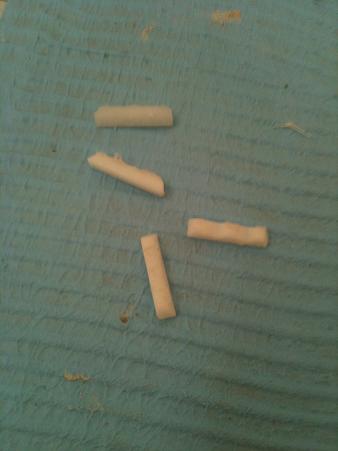
I first cut the 2 corner shelves out of the piece of Carrara marble, this would allow me to have 2 long straight side and enable me to be able to also cut the 2 square niche shelves from one piece of marble. This was a good way to cut down on wasting marble tile. When I cut the 2 square shelves for the niche, I made return/ears on the sides to add a little style (see picture 8). After I cut the shelves I pulled the pieces of marble back across to blade to make the slight micro bevel on the edge of the shelves.

After the shelves were cut I polished them with my Alpha PVA dry pads. I like the Alpha quick change adapter and dry pads for my grinder since its a good way to get fast results and a nice polish on natural stone for a good price. The niche shelves were cut to fit perfectly inside the niche, I then installed them in the tiled area’s. Once everything was grouted and caulked they became a beautiful working part of the shower.

We can also make these custom shelves for you upon request for your shower installation. Contact Us for more info and pricing.

In my next blog I will show you how I make Travertine shelves for a niche.

To see the original blog go to our website:
Making a Carrara Marble Soap & Niche Shelf

Thursday, June 24, 2010

How to Cut Glass Tile....

http://ceramictec.com/how-to-cut-glass-tile

Installing glass tile can be tricky, but cutting it can be even trickier. People are always asking how to cut small glass tile without chipping it, cracking it, having the pieces fall into the wet saw trays groove or having it shoot out of their fingers when they cut it. From over the years of installing glass tile I have learned a few tricks. One of the most simplest is to make sure the smaller glass tile that are mesh mounted have a solid backing under it when you pushing it through the wet saw. Another thing you want to make sure you do is to have the glass tile held down so it doesn’t move around while cutting it.

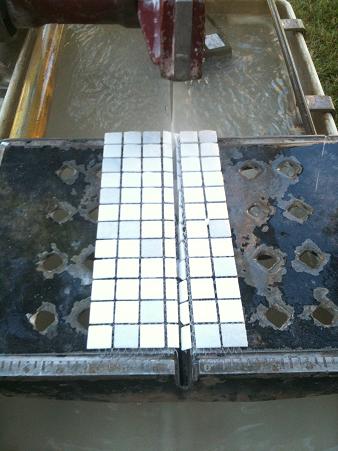
Glass tile once wet on mesh sheets or paper backed glass tile sheets start to soften the glue, once that happens they start to fall off. Sometimes that isn’t a bad thing when you want to put them in one at a time, but can be annoying when trying to install a row of them mounted. In the first picture below you can see the wrong way and the trouble you will have by just sitting the glass tile sheet on the wet saw tray. The glass tile once cut will drop down into the opening for the blade, it also chips when not supported 100% as it is being cut. If your wet saw has an adjustable head/motor you can raise it up and use a scrap piece of plywood to support the small glass tile.

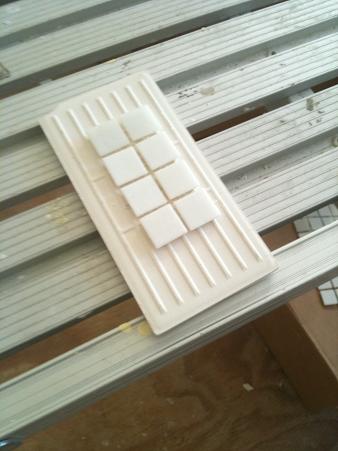
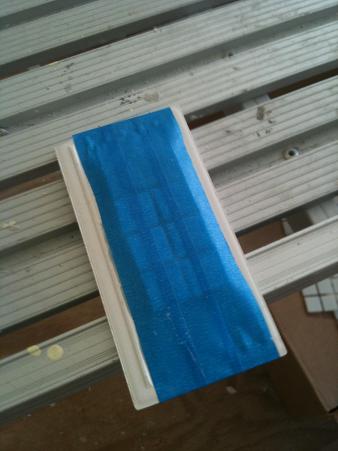
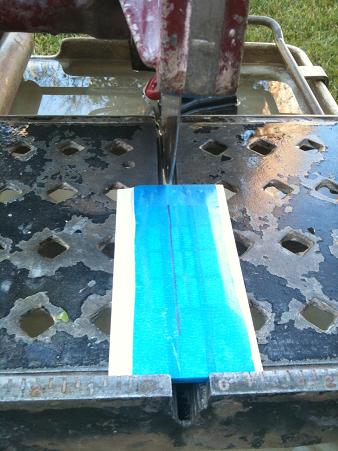
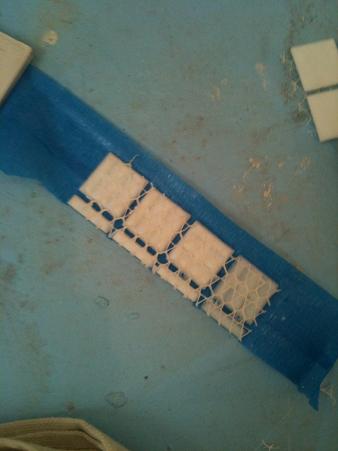
In the rest of the pictures you can see my trick for cutting small glass tile with a mesh backing and trying to get a bunch very small pieces all the same size. I use a scrap ceramic tile or whatever field tile you are using on your tile project. I then blue tape the small glass tile securely to the backside of the ceramic tile. Then I make my cut mark on the tape and use blue painters tape since you can see through it and know right where the mark is on the glass tile. Then align up the mark to the blade on the wet saw and make the cut. The glass tile mesh barely gets wet but there is enough water on the blade to make a clean cut. After the cut I remove the tape to see my precise cuts that are dry and still attached to the mesh backing, ready to install into the modified thinset I am using to set the glass tile on the waterproofed shower mud floor.

Glass tile is becoming more popular in the areas like Tampa, St. Petersburg, Sarasota, Orlando, Clearwater, Brandon, Bradenton & other largely populated area’s in Florida and other U.S. cities with homes that are stylish and keeping up with current bathroom, kitchen & backsplash tile trends. People are having glass tile installed in the bathroom on the walls as an accent band, as a deco, on shower floors, back splashes and in pools. I wouldn’t suggest a opaque or paper face mounted glass tile install for a DIY job, glass tile is tricky and there are certain rules you need to adhere to from the glass tile manufacturer. One being the use of a highly modified white thinset. Some require a crack anti fracture membrane, while some will scratch with the use of a specific type of sanded grout. And by all means Do Not Use Mastic or Premixed Thinset.

You also want to make sure you use the proper sized notched trowel or you could ruin your glass tile install with too deep of a trowel and thinset coming up through the grout joints, or not deep enough of a trowel and the tile not adhering or bedding properly to the substrate and becoming loose and ruining the installation. I would highly suggest you read up on glass tile or find a tile contractor that is familiar with glass tile, it’s special installation requirements, has done a fair amount of glass tile installs and has references.

The glass tile used in this install was Hakatai TA810 M China Blend

If you have any questions feel free to email me and I can help with some simple questions. Or if your looking for an estimate in Florida on a glass tile project you have coming up, please Contact Us for a Free Estimate.