Showing posts with label gloss. Show all posts

Thursday, June 24, 2010

How to Cut Glass Tile....

http://ceramictec.com/how-to-cut-glass-tile

Installing glass tile can be tricky, but cutting it can be even trickier. People are always asking how to cut small glass tile without chipping it, cracking it, having the pieces fall into the wet saw trays groove or having it shoot out of their fingers when they cut it. From over the years of installing glass tile I have learned a few tricks. One of the most simplest is to make sure the smaller glass tile that are mesh mounted have a solid backing under it when you pushing it through the wet saw. Another thing you want to make sure you do is to have the glass tile held down so it doesn’t move around while cutting it.

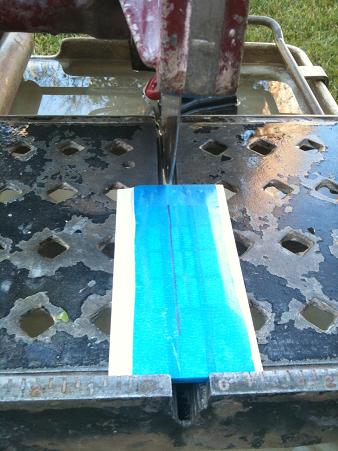
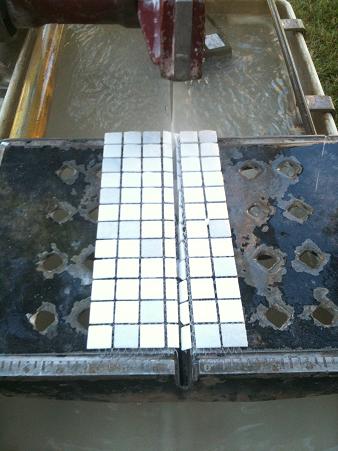
Glass tile once wet on mesh sheets or paper backed glass tile sheets start to soften the glue, once that happens they start to fall off. Sometimes that isn’t a bad thing when you want to put them in one at a time, but can be annoying when trying to install a row of them mounted. In the first picture below you can see the wrong way and the trouble you will have by just sitting the glass tile sheet on the wet saw tray. The glass tile once cut will drop down into the opening for the blade, it also chips when not supported 100% as it is being cut. If your wet saw has an adjustable head/motor you can raise it up and use a scrap piece of plywood to support the small glass tile.

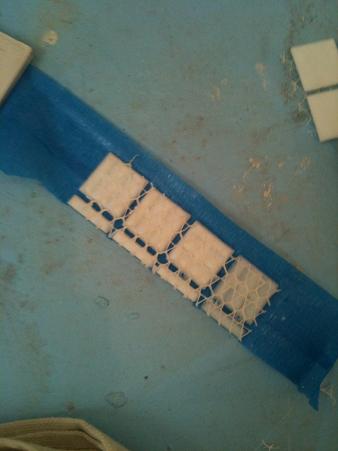
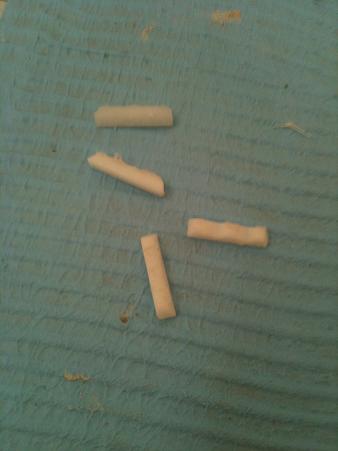
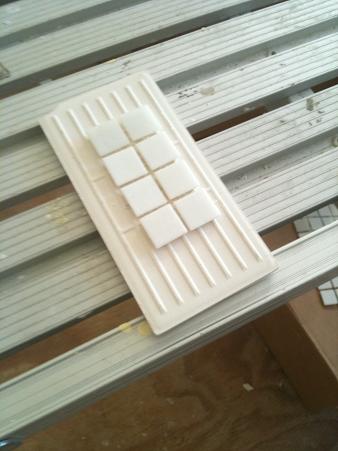
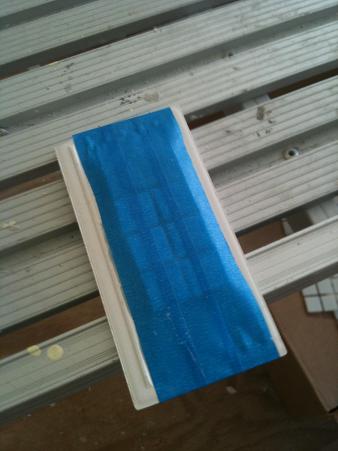
In the rest of the pictures you can see my trick for cutting small glass tile with a mesh backing and trying to get a bunch very small pieces all the same size. I use a scrap ceramic tile or whatever field tile you are using on your tile project. I then blue tape the small glass tile securely to the backside of the ceramic tile. Then I make my cut mark on the tape and use blue painters tape since you can see through it and know right where the mark is on the glass tile. Then align up the mark to the blade on the wet saw and make the cut. The glass tile mesh barely gets wet but there is enough water on the blade to make a clean cut. After the cut I remove the tape to see my precise cuts that are dry and still attached to the mesh backing, ready to install into the modified thinset I am using to set the glass tile on the waterproofed shower mud floor.

Glass tile is becoming more popular in the areas like Tampa, St. Petersburg, Sarasota, Orlando, Clearwater, Brandon, Bradenton & other largely populated area’s in Florida and other U.S. cities with homes that are stylish and keeping up with current bathroom, kitchen & backsplash tile trends. People are having glass tile installed in the bathroom on the walls as an accent band, as a deco, on shower floors, back splashes and in pools. I wouldn’t suggest a opaque or paper face mounted glass tile install for a DIY job, glass tile is tricky and there are certain rules you need to adhere to from the glass tile manufacturer. One being the use of a highly modified white thinset. Some require a crack anti fracture membrane, while some will scratch with the use of a specific type of sanded grout. And by all means Do Not Use Mastic or Premixed Thinset.

You also want to make sure you use the proper sized notched trowel or you could ruin your glass tile install with too deep of a trowel and thinset coming up through the grout joints, or not deep enough of a trowel and the tile not adhering or bedding properly to the substrate and becoming loose and ruining the installation. I would highly suggest you read up on glass tile or find a tile contractor that is familiar with glass tile, it’s special installation requirements, has done a fair amount of glass tile installs and has references.

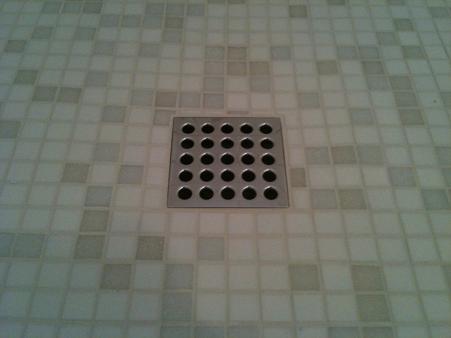
The glass tile used in this install was Hakatai TA810 M China Blend

If you have any questions feel free to email me and I can help with some simple questions. Or if your looking for an estimate in Florida on a glass tile project you have coming up, please Contact Us for a Free Estimate.
Saturday, April 24, 2010

Ceramic Tile Shower – Tampa, Florida

Rip Out, Prep, Waterproofing, Install Tile:

We completed a hall bath shower rip out & replace in Tampa for a Architect we know. This is his personal home and is Florida and is about 30 years old. The shower pan was done incorrectly and it didn’t have a pre-slope under the liner, had a drain directly connected to the drain pipe and was nailed at the bottom through the liner to the studs. Whoever built this shower pan had no idea on how to build a properly waterproofed traditional pre slope pan & liner. Where would the water go that saturates the mud bed without having weep holes? Something us professionals don’t like seeing.

Being a Tile Contractor in Tampa there was something else I didn’t like seeing, it was the way they did a fake wall mud tile job look. They pretty much put cement board over top drywall and used mastic with 4×4 wall tile and a mud cap A-4200. It gives the look of a built out mud wall but not an actual good way of doing it. Mastic is NEVER good in a shower or wet area and can re-emulsify when wet over time. We demoed the whole old shower area, removing the wall tile, cementboard, old drywall, shower floor tile, mud bed, liner & drain.

We then installed the new cement board, mesh taped the joints and used thinset over them. Installed a new Ebbe drain riser and drain and a new mud bed using Laticrete 3701 fortified mortar bed. The 3701 is a thick-bed mortar that is exceptionally strong and resistant to weather, frost, thermal and physical shock, pre blended and perfect for a job like this. After the cement board and mesh tape was up and the Mud bed cured we used HydroBan liquid waterproofing on the shower pan and up the walls and over the shower curb. We used the divot method to tie the waterproofing into the clamping ring drain, and the filled the divot, packed with pea gravel, mud and more HydroBan over it.

Once the HydroBan was dry we then laid out our wall tile to achieve the best full size cuts in the corners. The tile we were using picked out by the Homeowner was a Floor Gres 4×4 Ceramic White tile with scalloped edges. He also selected Spanish style red rectified porcelain 16×16 tile to go on the bath floor from a local tile showroom. We also cut the 16×16 floor tile down to match the size of the Ebbe drain grate.

The installation went great since our wall and floor prep was done correctly. The scalloped edged tile were hard to put up since the varying sized grout joints could not take a spacer, so for that we used an non sag mortar from Laticrete called MultiMax 255 which held the tile in place and didn’t allow them to slide, better then using a ledger board and spacers. We then set the rectified floor tile with 3/16″ grout joints per the owners request. He purchased a matching red grout for the main floor and the shower floor and a bright white sanded grout for the wall tile, both grouts were Pro Spec 700 sanded grout.

Grouting went easy and we cleaned up and final washed the tile and turned it over to the homeowner. He was very pleased with how it came out and could not believe the before and after look of his bathroom. The owner was going to install a hard Ipe wood for his curb. I usually suggest a marble sill or tile on the curb, but seeing how the dense cell structure of IPÊ (all heart wood) is not only naturally resistant to insects but also to decay, rot, molds and weather has little to no effect upon the structural integrity of IPÊ wood, it would do good as a shower curb sill. He was also going to urethane seal it and I suggested to him to attach it with either an epoxy or a polyurethane construction adhesive like Liquid Nail or PL Premium.

below are some pictures taken during to project, I hope you enjoy them.


Monday, January 25, 2010

Commonly used Tile in Florida Definition….

to view our current blogs go to our website or read the original here.
http://ceramictec.com/commonly-used-tile-in-florida-definition


At Ceramictec we install the finest selection of name brand tile with the widest selection of patterns, textures, sizes and colors. No matter what your decor or color scheme we can help you find the perfect tile for your home decorating.

* Stain Resistant
* Scratch Resistant
* Fire Resistant
* Doesn’t Fade from Sun Light
* Easy to Clean


Porcelain Tile — Is a tile that is generally made by the dust pressed method from porcelain clays which result in a tile that is dense, impervious, fine grained and smooth, with a sharply formed face. Porcelain tiles usually have a much lower water absorption rate (less than 0.5%) than non-porcelain tiles making them frost resistant or frost-proof. Glazed porcelain tiles are much harder and more wear and damage resistant than non-porcelain ceramic tiles, making them suitable for any application from light traffic to the heaviest residential and light commercial traffic. Full body/though body porcelain tiles carry the color and pattern through the entire thickness of the tile making them virtually impervious to wear and are suitable for any application from residential to the highest traffic commercial or industrial applications. Porcelain tiles are available in matte, unglazed or a high polished finish.

Glazed Tile — Most of the common ceramic floor tiles have either a glazed, or unglazed surface. The glazed tiles have a special ceramic coating that is applied to the body of the tile and then fired under high heat. The glazing becomes hard.

Unglazed Floor Tile — There is no glazing or any other coating applied to these tiles. Because these tiles are porous it is recommended that a special penetrating sealant be used to maintain this type of floors and to help prevent stains from seeping into the pores of the tiles. Their color is the same on the face of the tile as it is on the back resulting in very durable tiles that do not show the effects of heavy traffic.

Marble — Marble is a natural product and is not made in a factory. For this reason no two pieces of marble look the same and the veining is a natural characteristic in all marble. One of the more popular marble tile in Florida is Travertine. There are special marble sealants to help protect from staining of the face. Extra care should be used when cleaning and all abrasives and acidic cleaners should never be used when cleaning. Even colas, some juices, and possibly ammonia may destroy the marble finish.

Granite — This is another natural stone and is not manufactured in a factory. Granite can be used indoors or outdoors and is less porous than marble. It is still recommended that you use a sealant to protect the finish from staining.

Grout — Grout is a mixture of cement and a color additive. For tile floors with wider spaces between each tile sand is added to the grout. Also, a liquid latex additive can be added to the grout to give better resiliency to the grouted areas. For ease of maintenance a penetrating sealant should be used on the grout. It should be noted you may see a change in color of your grout over time. To stop this we highly recommend an upgrade to an epoxy grout.

Some of the other important things we can help with when selecting a tile floor is the slip-resistance, the size and color of the grout joints, the thickness of the tile, height variations from room to room, size of the tile, suitability of the subfloor, and cleaning of the tile.

If your interested in getting a Free Estimate Please Contact Us.
.
.
.

Thursday, January 21, 2010

Tile Setter’s Advice....

For Florida Bathroom Floor Tiles….

Selecting tile for your Florida bathroom is an area where I feel you should adhere to some basic principals. But, this is also an area where you can let your imagination shine. Various sizes, colors, and textures combined can make your bathroom truly a work of art!

Let’s begin.

* First, you should consider maintenance and ease of such.
* Second, you should consider texture and where to place it.
* Third, colors.
* Fourth, design and design elements consistent with the interior flavor or theme of your home or space.
* Maintenance is often overlooked at the expense of loss of luster and shine over a period of time. Nothing looks worse than a dull and well worn Travertine.

My advice after having busting out many Travertine floors is to consider Granite, Ceramic, Porcelain, or Glass for the bathroom floor. Use a durable non porous easy to clean material. You can use Travertine but remember it needs to be sealed. As a floor surface this can build up if not maintained properly. Like Marble, Travertine is a soft material and requires maintenance and can be stained, scratched, and easily chipped.

Textures on the floors can add an immediate design element. Perhaps a textured material or natural stone placed strategically in the center of the floor or as a perimeter band. Running your floor tile on a diagonal or diamond pattern has the effect of making your room look larger. However, expect to pay anywhere from $1.00-2.00 extra and more for a diagonal diamond pattern per square foot.

Design elements will add to cost as well. As much as $5.00 or more per square foot can be expected. Textures such as tumbled Marble would best be suited on walls. Round Riverbed Stones work well on shower floors and offer somewhat of a therapeutic value. Tumbled Marble or another color of Natural Stone used as a color band if incorporated correctly adds excitement and an “out of the ordinary” point of interest.

Colors. Always remember when using Natural Stone the installation generally costs more because tile setters have to craft, shape, grind, polish and form many pieces of the material. More often than not, there are no pre-formed corners and edges as there are with ceramic tile. And, the process takes a lot more time. You’ll appreciate that more when shelling out more per square foot for the material alone.

Another point to remember is that almost any tile including Natural Stone can have a pattern! You really need to open up a few boxes to determine if you may run into an issue here.For instance, some time ago we installed a Walnut Travertine shower and walls. As I removed tile from the boxes and it was placed on the wall, we could clearly see we had reassembled the cut slab straight out of the box. This is unusual but it happens. In other cases the same grain or flow of colors in Natural Stone be it Granite, Marble, Sandstone, Travertine, and Gemstone may not look good. Dark tile areas might need to be distributed within lighter tiles so you don’t wind up with too many dark or light tiles in one area.

If you are a DIY’er, when setting Travertine floors or walls be sure to use a thinset mortar that closely matches the tile surface color. Lighter Travertine should be placed with white thinset mortar and darker or chocolate Travertine should be set with gray thinset mortar. This is because Travertine is a porous material and your thinset can actually show through the surface or push through on installation. This can appear as a stain.

Design elements enhance the flavor of a space by using colors, textures, and sizes. A simple 6X6 shower enclosure will look much more appealing with a color stripe at the very least at about eye level. Using that same color stripe in other spots like the shower floor or inside a niche adds a little class.

There is a virtual universe of materials, colors, and textures at local distributors to flavor your next project. These additions add simple and attractive sophistication to an otherwise boring bathroom floor or shower.

The materials and ideas are as endless as your imagination and budget.

Be creative !

Saturday, October 3, 2009

Shade Variation in Ceramic & Porcelain Tile....

Many popular styles of ceramic tiles are designed and manufactured to appear and feel like natural stone, imitating their rugged surface and color variation. It's important to understand these variations while selecting and laying out your ceramic tile flooring. You will always be provided with a wide range of glazes, different gloss levels, colors and texture variations to choose from. Your choice should depend on the conditions present at your chosen location, whether commercial or residential.

A commonly preferred choice is a solid color tile because of its consistent look. However, shade variation is a natural factor in all fired ceramic products. In fact, certain tiles will show a certain amount variation even within their dye lots.

For the benefit of better understanding on the part of the consumer, shade variation categories have been devised to enable consumers choose their desired shade spectrum. These shade variation ratings are mentioned on the back label of each sample within either of the low, moderate, high or random categories.

Here is a brief explanation of these categories:

Low: Consistent shade and texture
Moderate: Moderate shade and texture variation
High: High shade and texture variation
Random: Very high shade and texture variation


The color of the tiles body is determined by the color of the clay used to manufacture it. It is usually the clay available in the surrounding regions of the manufacturing facility or sometimes imported from another region. You can have a look at the body of tile to find out if the color is red or white. The quality, however, depends on the processing standards of the manufacturers rather than the color of the body.

Color variations will also be present within the manufacturer's samples of tile of the same color. Moreover, it can be seen throughout the installed tiles on counter tops, walls and floors.

a couple of good tile manufacturers we use at Ceramictec Tile Contractors use are Crossville and Marazzi. to us they are a really good quality porcelain tile and made in the U.S.A.

If you have a particular tendency towards color consistency, then understanding the facts and talking to your tile contractor about your expectations can be a worthwhile pursuit.

some shade variations can be a beautiful thing.
like this full house tile renovation in Lakeland Florida for a customer.